

Installation Instructions for Crawl Space
Introduction
These installation instructions describe how to use the Pordrän system for various types of crawl spaces. Beforebeginning installation,start by reviewing the Important Prerequisites for the Pordrän System’s Function. Next, choose between the exterior or interior and follow the instructions for correctly installing the Pordrän panels and drainage pipe. Then proceed to Step 2—installation of the geotextile and safety fabric—and then to Step 3—installation of the cover strip.Finally, Step 4—backfilling.
It’s not just exterior walls that can benefit from Pordrän; it can also be effectively installed “indoors” beneath the floor surface— read more about it here.
If you have any questions or need further assistance, please feel free to contact us.
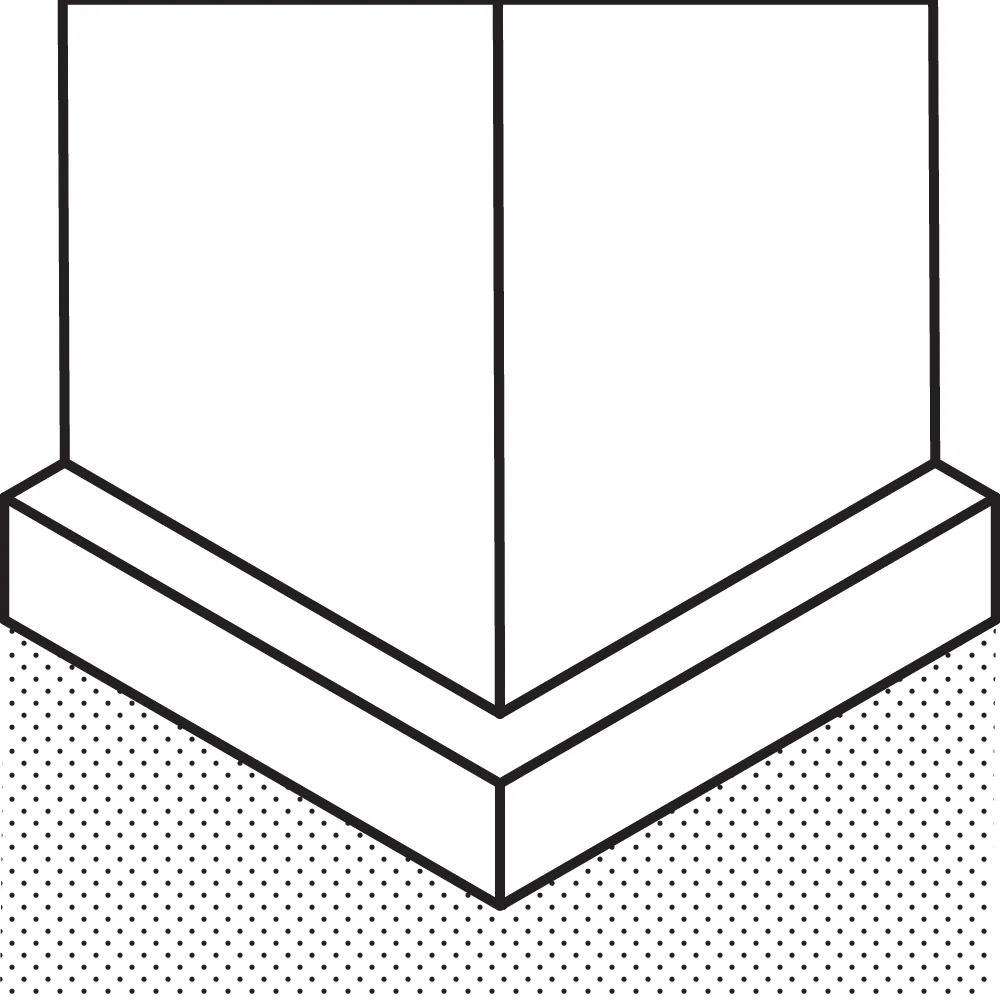
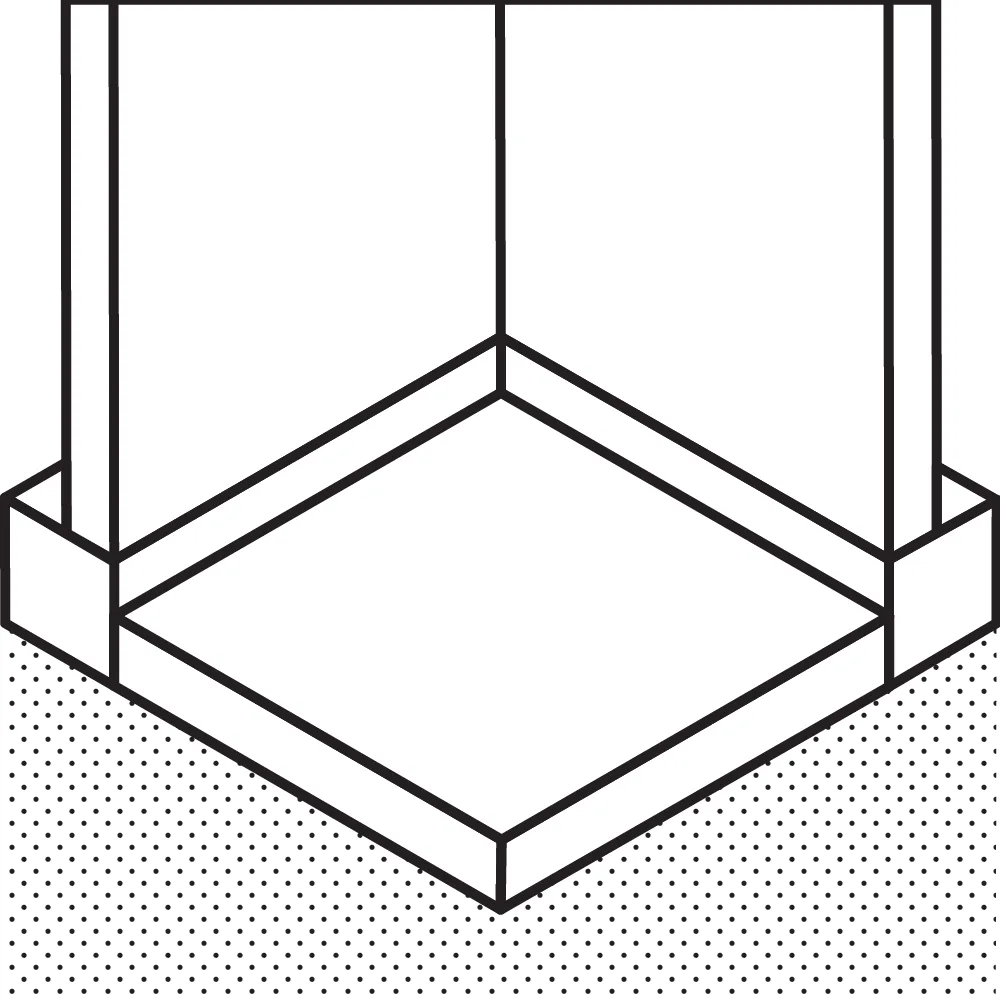
Crawl Space (Exterior)
Key prerequisites for the proper functioning of the Pordrän system
The following instructions must be followed and implemented before, during, and after the installation of Pordrän to ensure proper and correct operation.
-
Do not excavate within the load distribution angle—marked with (!) in the images. Excavation should be carried out at an angle of approximately 45 degrees from the bottom of the foundation footing.
-
When renovating, the old wall must be thoroughly cleaned of any dense layers.
-
All joints, both vertical and horizontal, must be sealed. This also applies to cracks in the foundation wall. Use Pordrän Tiivistysmassa.
-
Foundation walls made of lightweight clinker blocks, hollow blocks, or lightweight concrete blocks must be grouted before installing Pordrän panels.
-
Use Pordrän a density of P19 or P25 if you plan to use gravel weighing more than 100 kg for backfilling.
-
Stormwater management must be ensured. Roof drainage, ground grading, and diversion must be carried out in a professional manner.
-
The drainage pipe must be properly positioned vertically. The entire pipe must be located beneath the building’s structure; see the markings (!!) in the images. An exception to this rule may apply if the soil is very clayey, as lowering the drainage pipe could pose a risk of settlement in the building.
-
The drainage pipe must be accessible for inspection along its entire length, and proper drainage must be ensured.
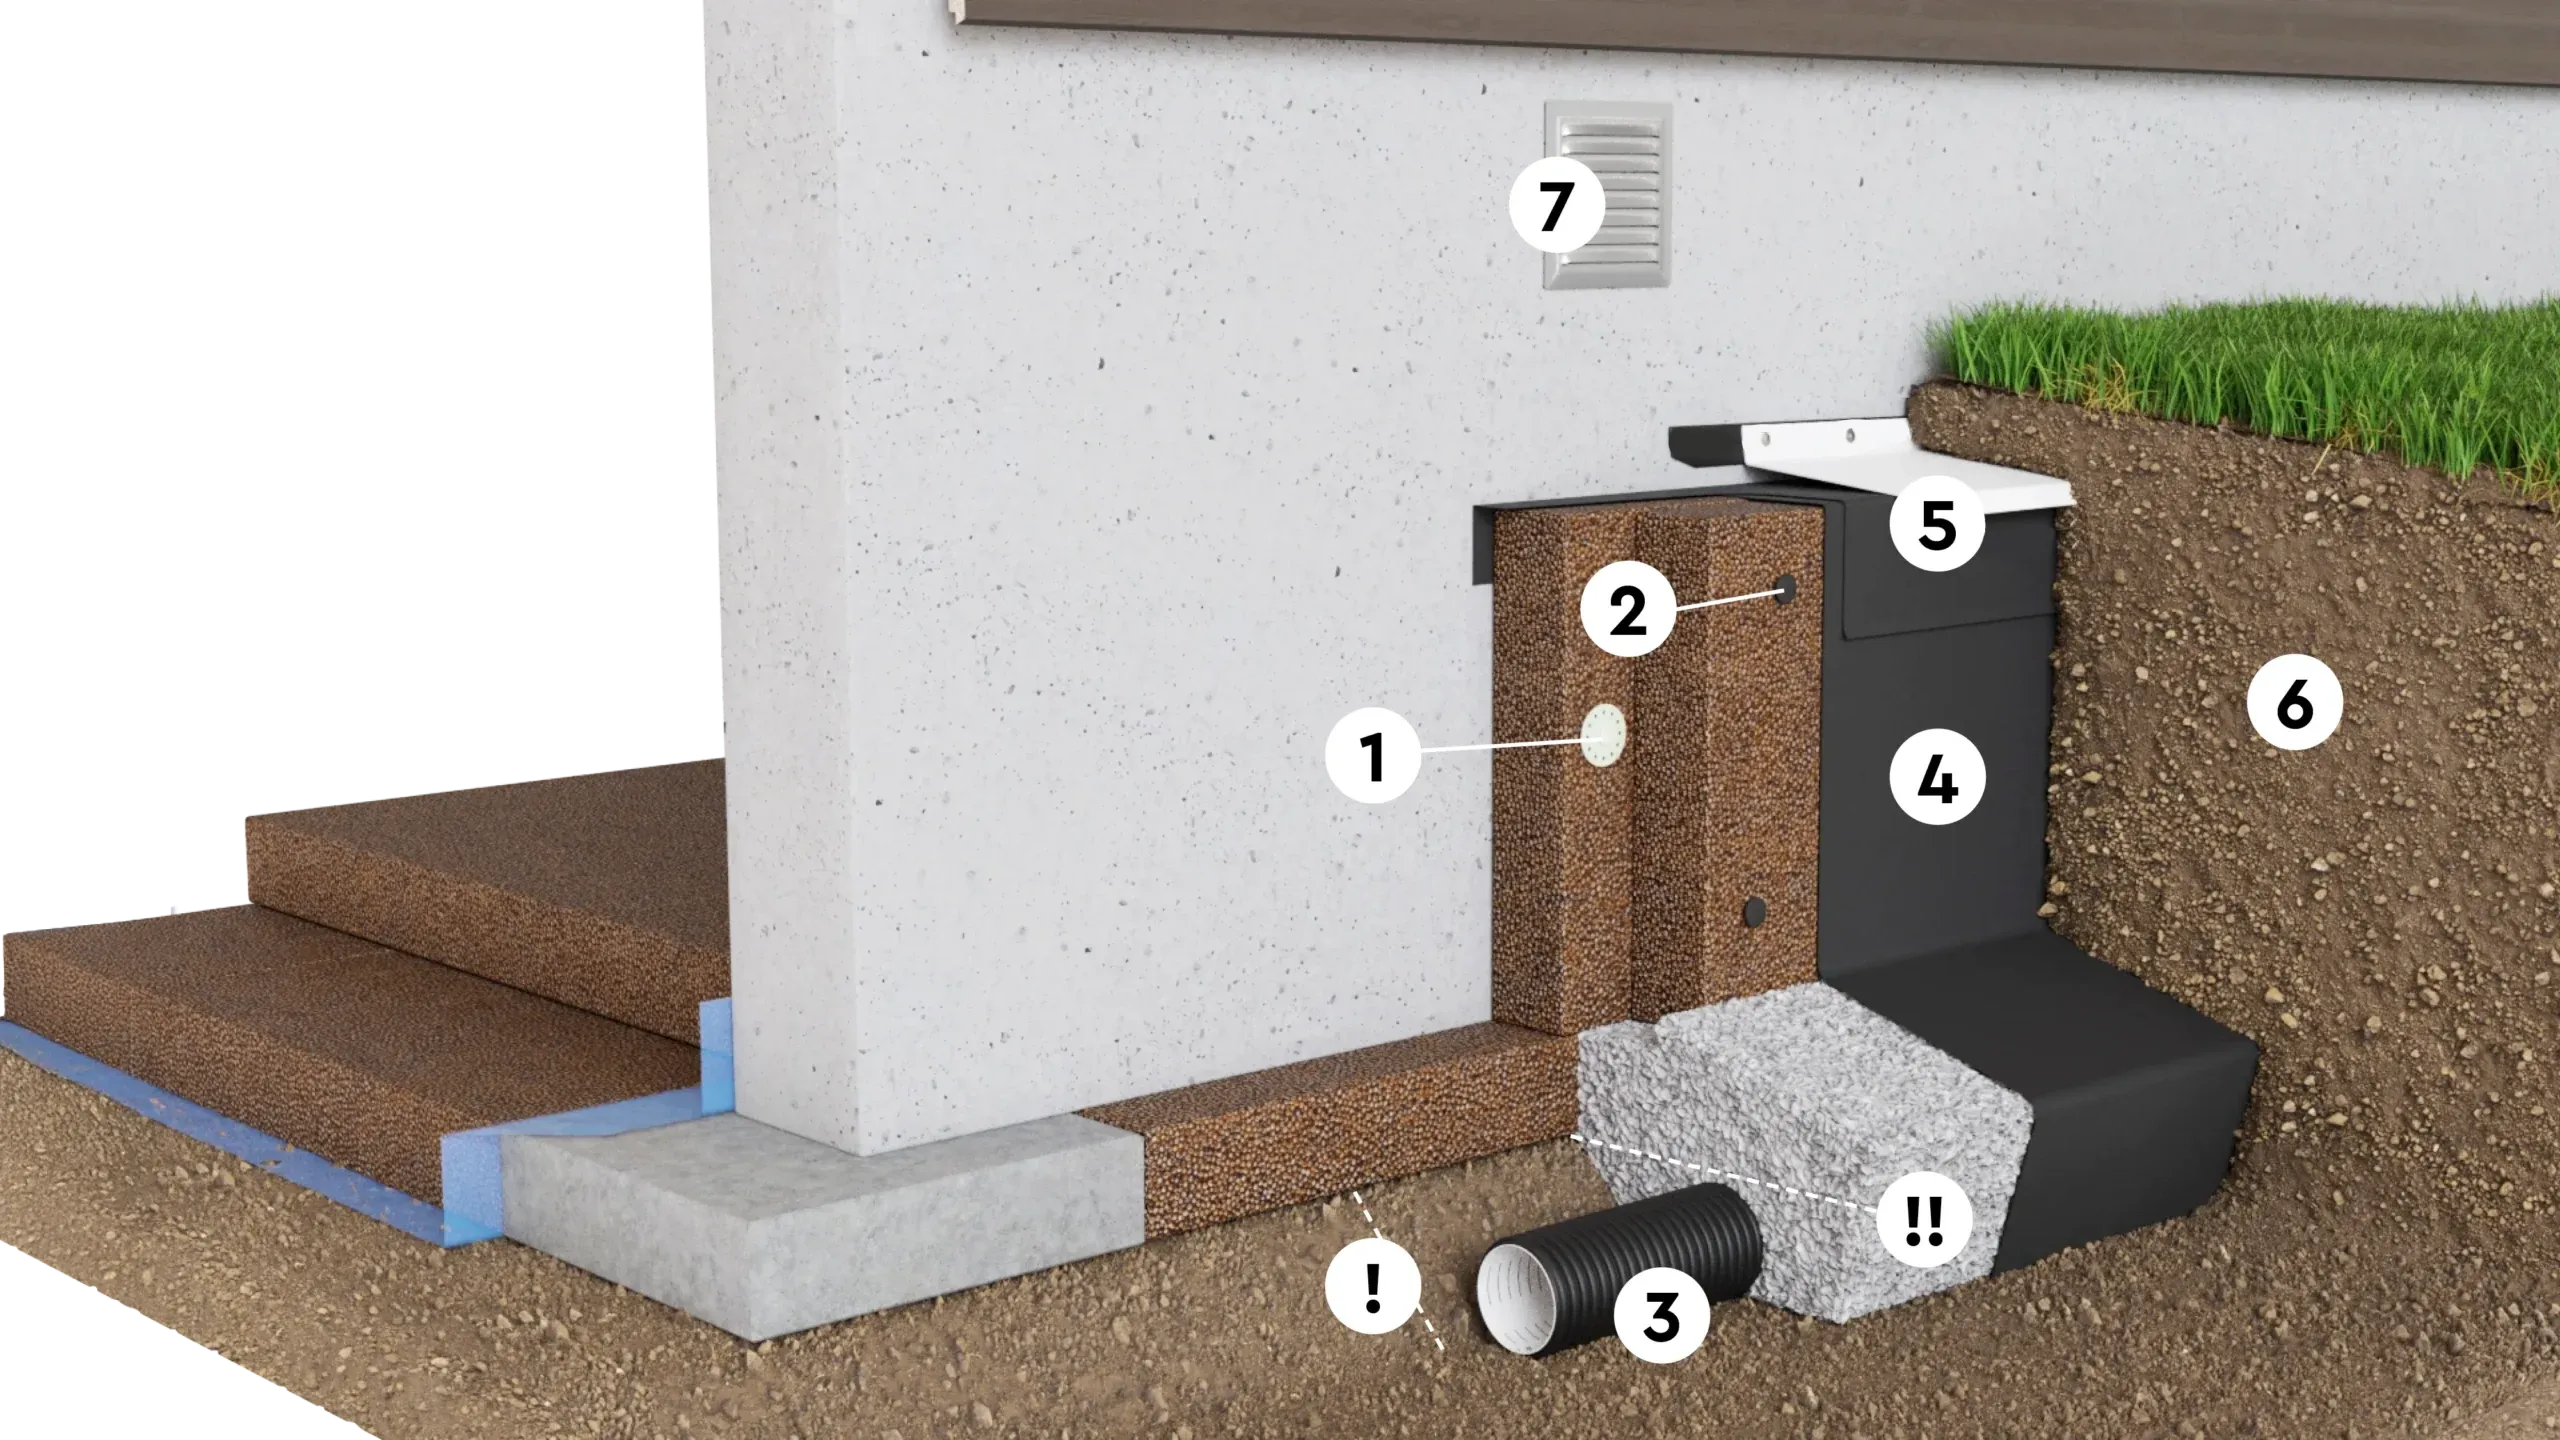
NOTE! Before you begin, carefully read through the basic requirements and all the steps in the instructions. Do not excavate within the load-spreading angle—marked with (!) in the illustrations. The drainage pipe must be correctly positioned vertically. The entire pipe must be located beneath the building’s structure; see the marking (!!) in the illustrations.
This image shows a crawl space in a new construction; in renovation projects, other structures may be present. In that case, refer to our instructions for Basements – Floors & Foundation Walls. Contact Pordrän if you are unsure.
-
The first layer of Pordrän panels (P19) is installed against the basement wall using Pordrän —1–2 per panel. Drill through the panel into the wall using an 8 mm drill bit. Install the panels at a height of 30–50 mm below the intended finished ground level.
-
If a second layer of Pordrän panels is installed, secure them to the first layer using Pordrän . Use approximately 5 fasteners per panel.
-
Place the drainage pipe and the gravel/crushed stone as shown in the illustrations. It is best to lay the pipe and the base layer first before installing the panels.
-
The nonwoven fabric is applied as described in step 2.
-
The top cover strip is installed as described in step 3. The cover strip should be positioned 30–50 mm below the finished ground surface.
-
Refilling is performed according to step 4.
-
The protective grille is installed while the fan is running.
Crawl Space (Inside)
Key prerequisites for the proper functioning of the Pordrän system
The following instructions must be followed and implemented before, during, and after the installation of Pordrän to ensure proper and correct operation.
-
Complete all necessary preparatory work before laying Pordrän on the ground.
-
Clear the crawl space of organic debris, such as wood and other trash. Level the ground surface. No drainage layer is needed in the crawl space.
-
Treat any mold infestations. Use appropriate products and always follow the manufacturer’s safety instructions. For extensive infestations, consult a professional.
-
Remove the existing insulation from the floor joists.
-
Carefully seal any cracks, gaps, and other openings in the floor joists.
-
Use Pordrän sealant to seal cracks and joints in the foundation walls.
-
Close and seal all vents in the foundation walls. Install negative pressure ventilation according to the instructions. In this case, it is possible to use an existing vent. If the building is exposed to soil radon, conduct a radon measurement after the moisture barrier has been completed. If radon levels remain elevated, contact an expert for advice.
-
Negative pressure ventilation
Even though the crawl space stays warm and dry, emissions such as radon and earthy odors can seep up. This can be remedied by installing negative-pressure ventilation with a fan. For best results, the fan’s speed should be adjustable.
-
If you want to monitor relative humidity and temperature, install a humidity and temperature sensor. Place the sensor on the underside of the floor joists, on the north side where it is usually the most humid and cold.
-
While in storage at the construction site, the panels must be protected from physical damage and weather exposure. With Pordrän , you Pordrän backfill using existing material, even large stones and frozen soil. Stones larger than 100 mm must be placed on the trench slope and must not come into contact with the Pordrän panel or the geotextile.
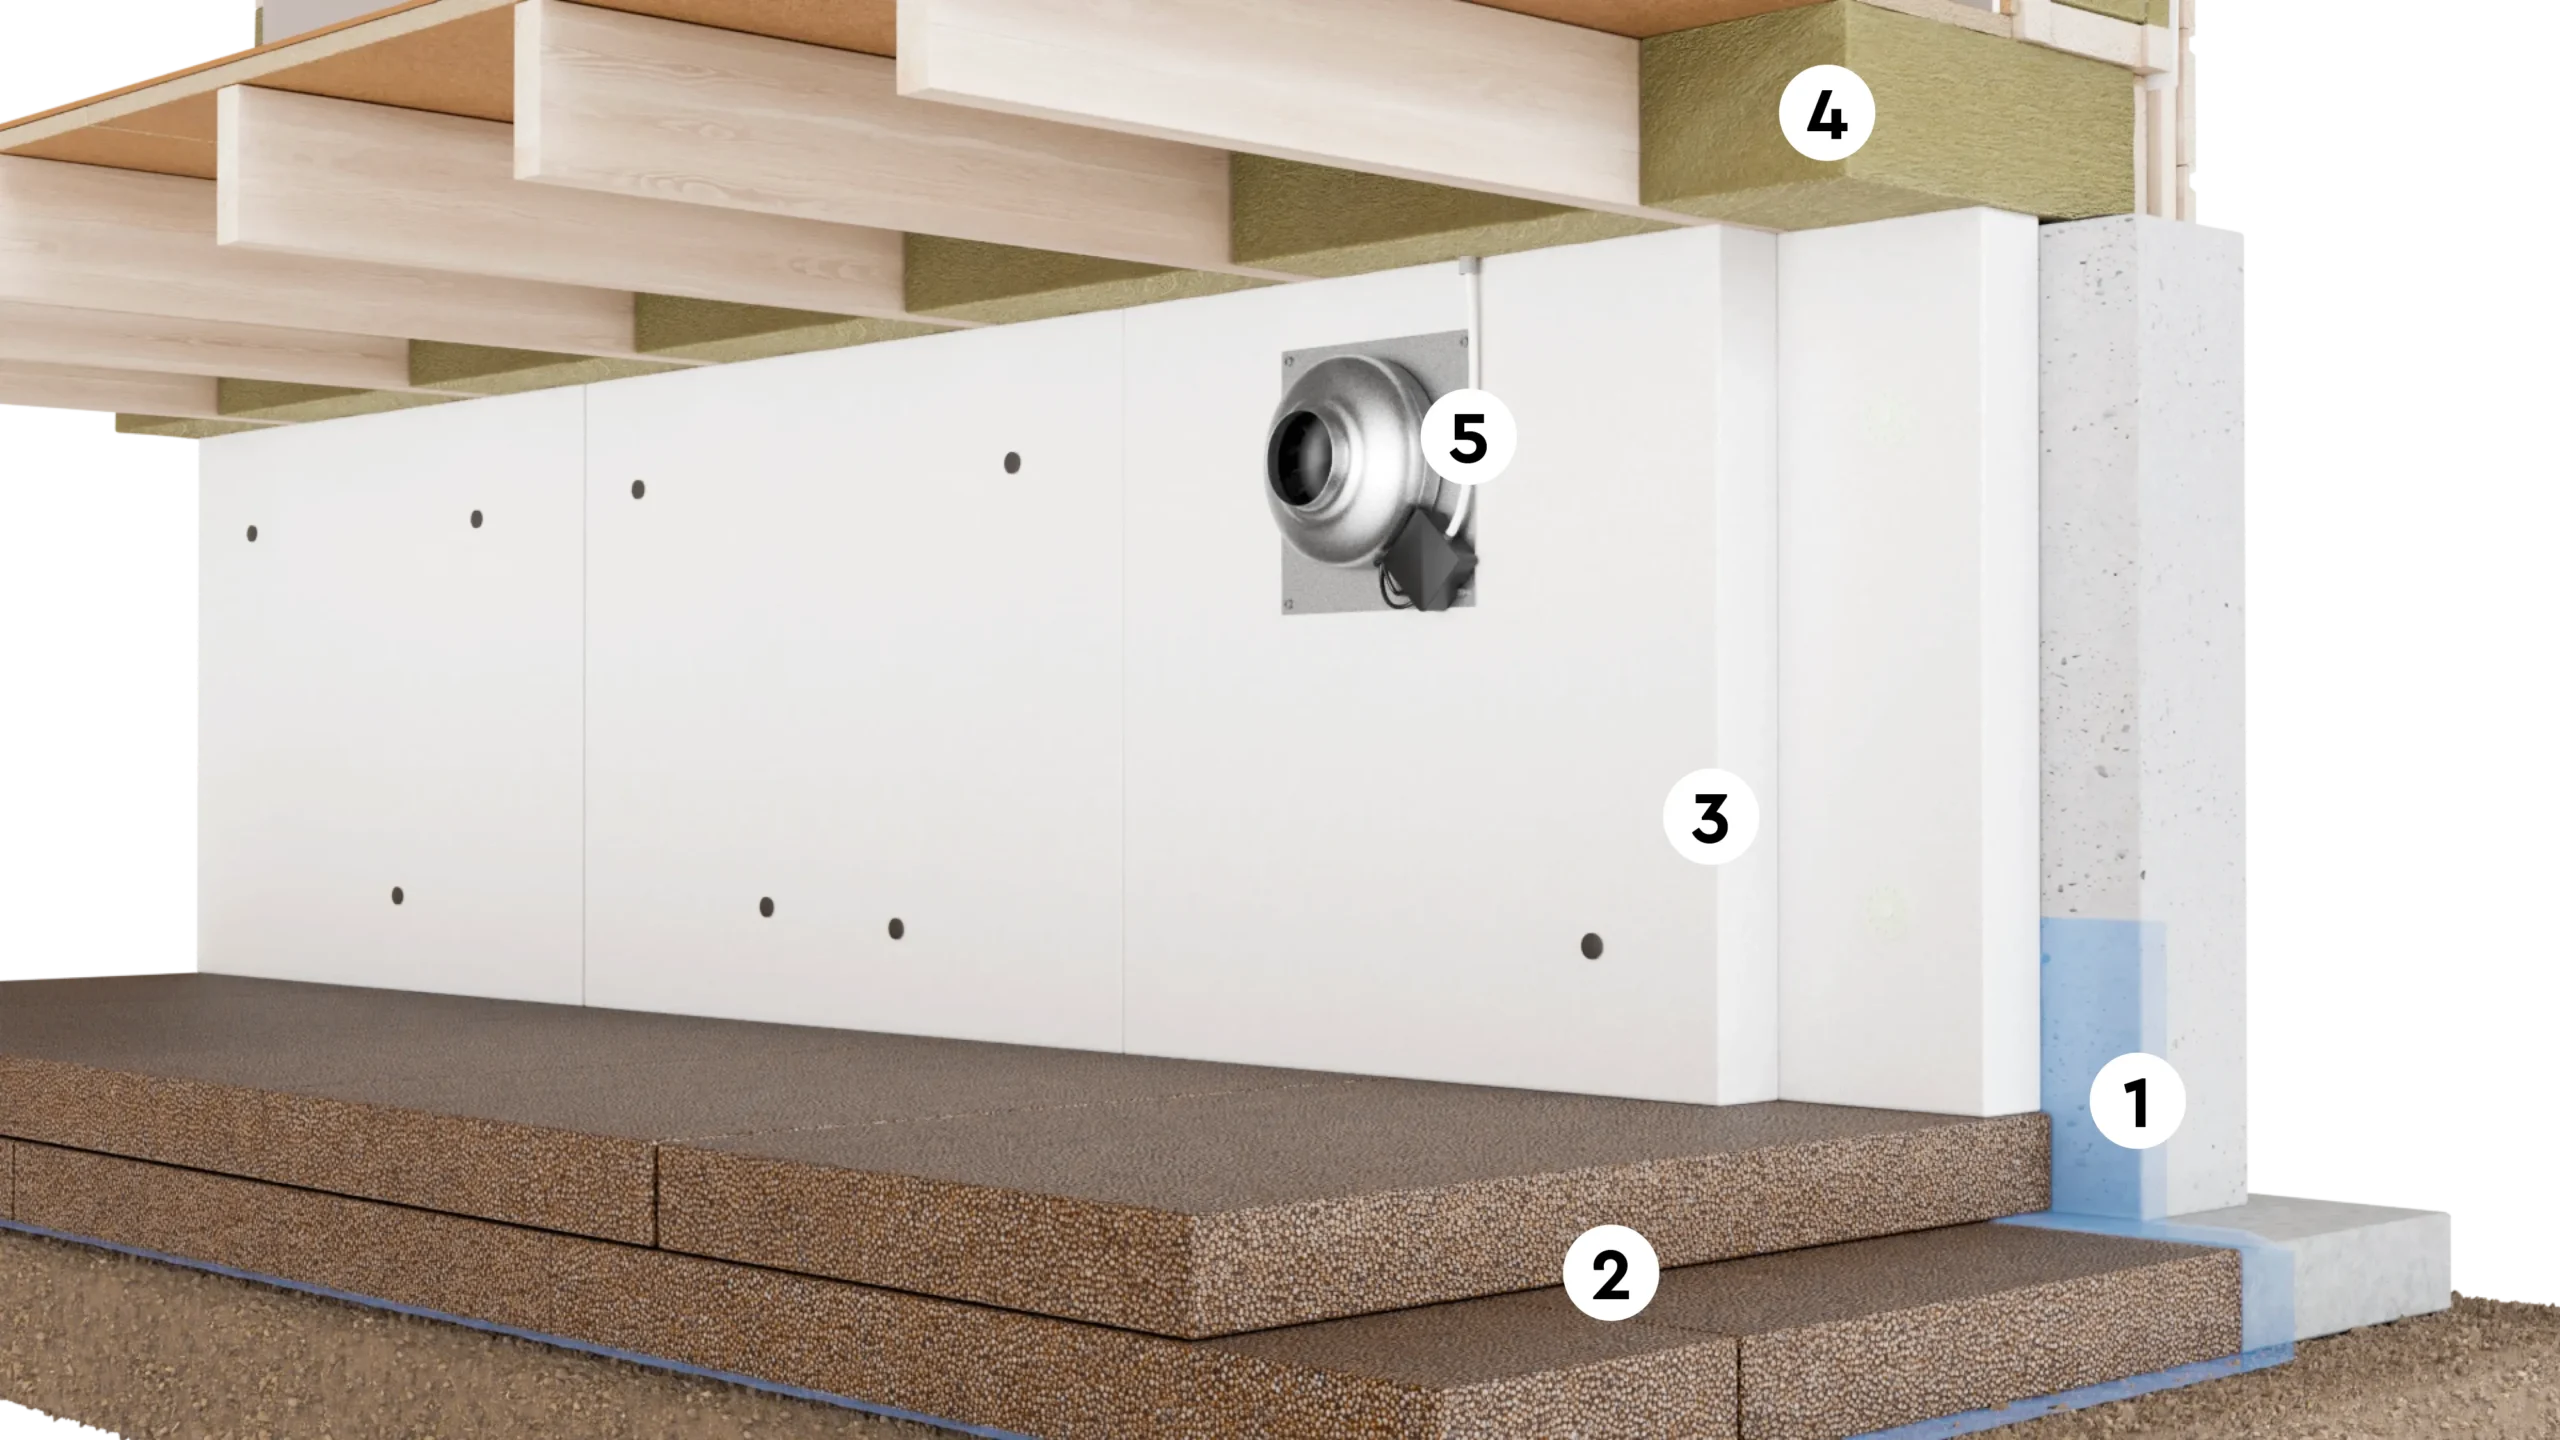
NOTE: Before you begin, please read the prerequisites and all the steps in the instructions carefully.
-
Cover the ground (which should be level and free of organic matter and debris) with weather-resistant, vapor-proof plastic sheeting. Let the plastic sheeting extend about 30 cm up the outer walls. Make a hole in the sheeting every square meter, with a diameter of 2–3 cm. If the ground slopes, it is sufficient to make holes only at the lowest points.
-
Lay down two layers of Pordrän panels. The second layer should be laid so that the joints are staggered.
-
Attach two layers of 100 mm cellular plastic panels to the exterior walls. Install the first layer of cellular plastic against the exterior wall using Pordrän —1–2 per panel. Drill through the panel into the wall using an 8 mm drill bit. Attach the second layer to the first layer using Pordrän . Use 5 clips per panel.
-
Insulate the joist floor completely against the exterior walls, 500 mm from the inside of the exterior walls. If underfloor heating is installed, insulate the rest of the joist floor with 70 mm of insulation. If there is no underfloor heating, leave the remaining joist floor uninsulated.
-
Install a negative pressure fan; a suitable model is the Östberg KVFU EC wall fan. Contact a professional if you are unsure. All electrical installations must be carried out in accordance with the Swedish Electrical Safety Authority’s regulations.
Step 2
Fiber and safety fabric
Geotextile fabric is the most common method. Geomembrane is used on slopes and in trenches deeper than 3 meters. The geomembrane must not be spread over Pordrän or the drainage layer; it must only be used vertically, as shown in the images.
Nonwoven fabric
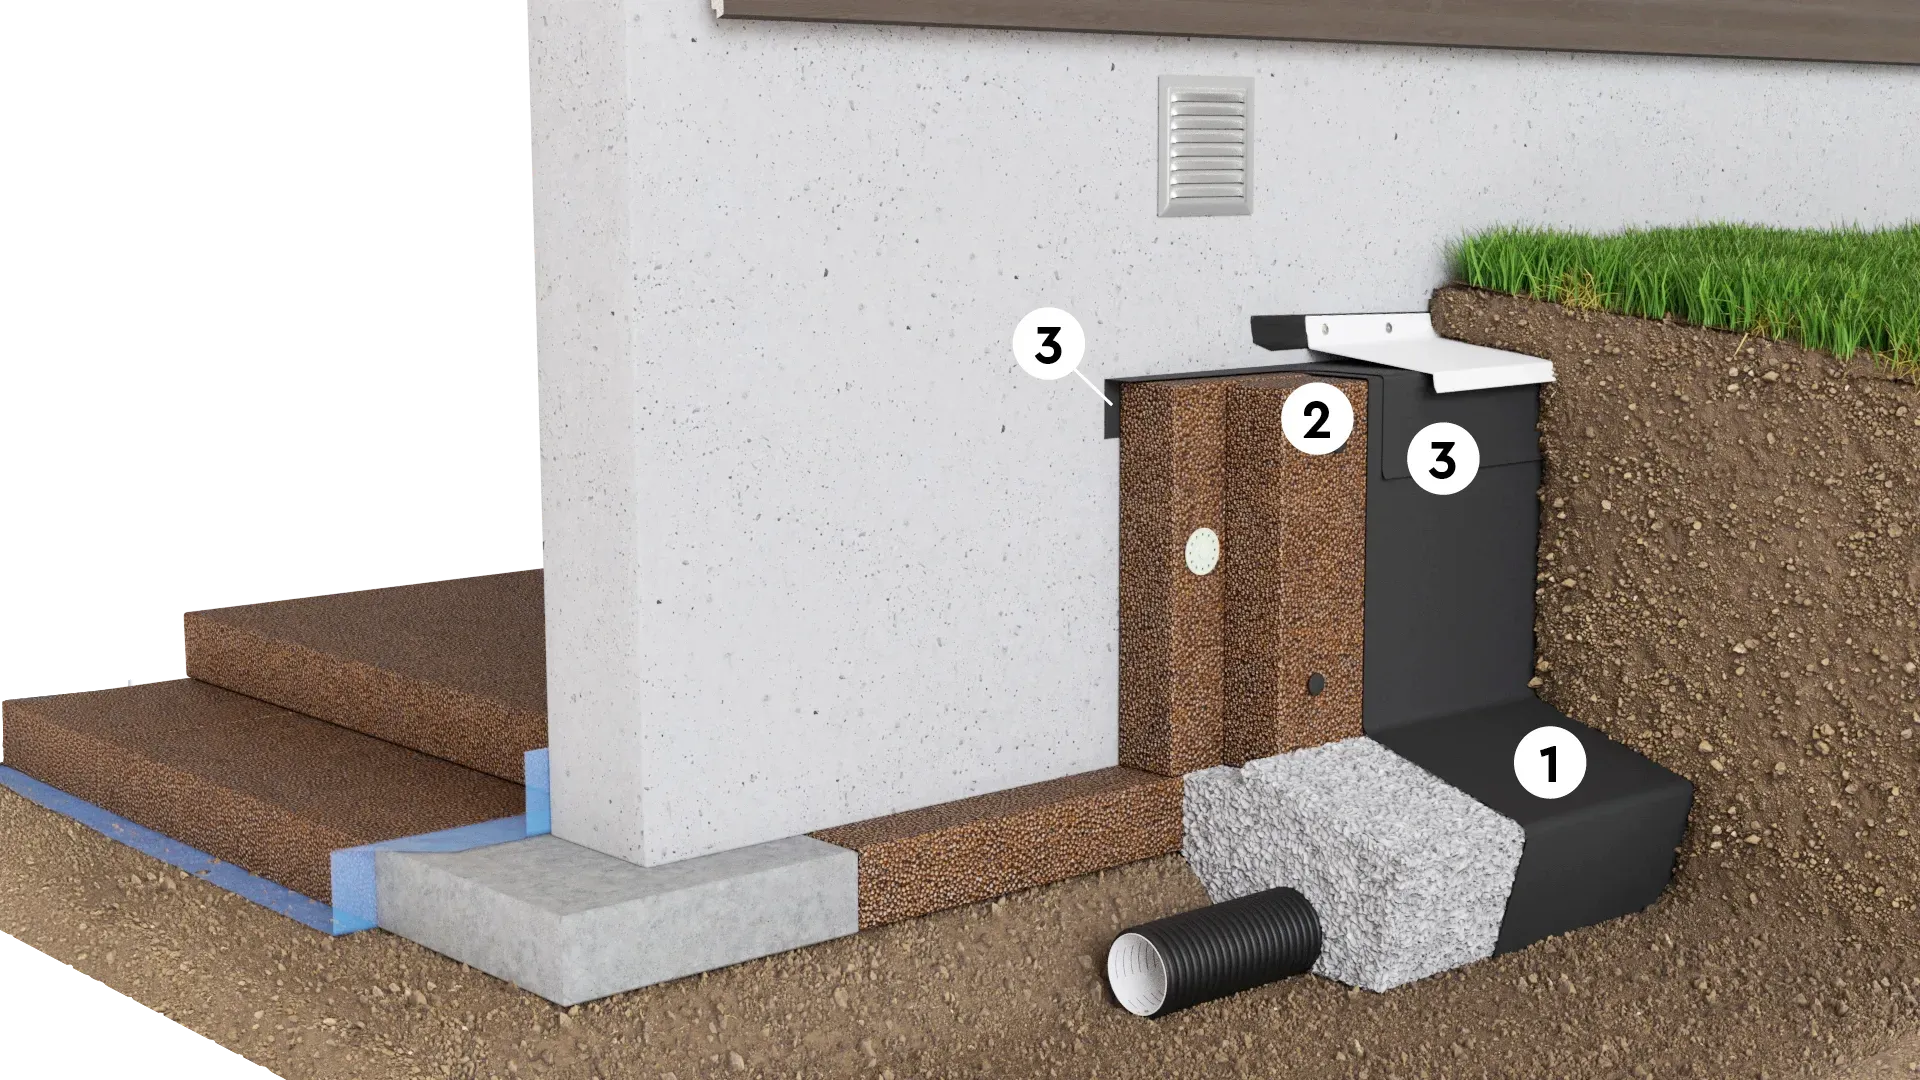
NOTE: Before you begin, please read the prerequisites and all the steps in the instructions carefully.
-
Make sure the geotextile covers the entire area down to the bottom of the trench, between the trench slope and the drainage layer. Allow for an overlap of approximately 250 mm.
-
The fabric coming from below must not be attached to the cover strip; instead, it should be folded around the top edge and behind the Pordrän panel.
-
Finish installing the geotextile by folding Pordrän behind the innermost Pordrän panel.
Step 3
Cover list
Over the fabric
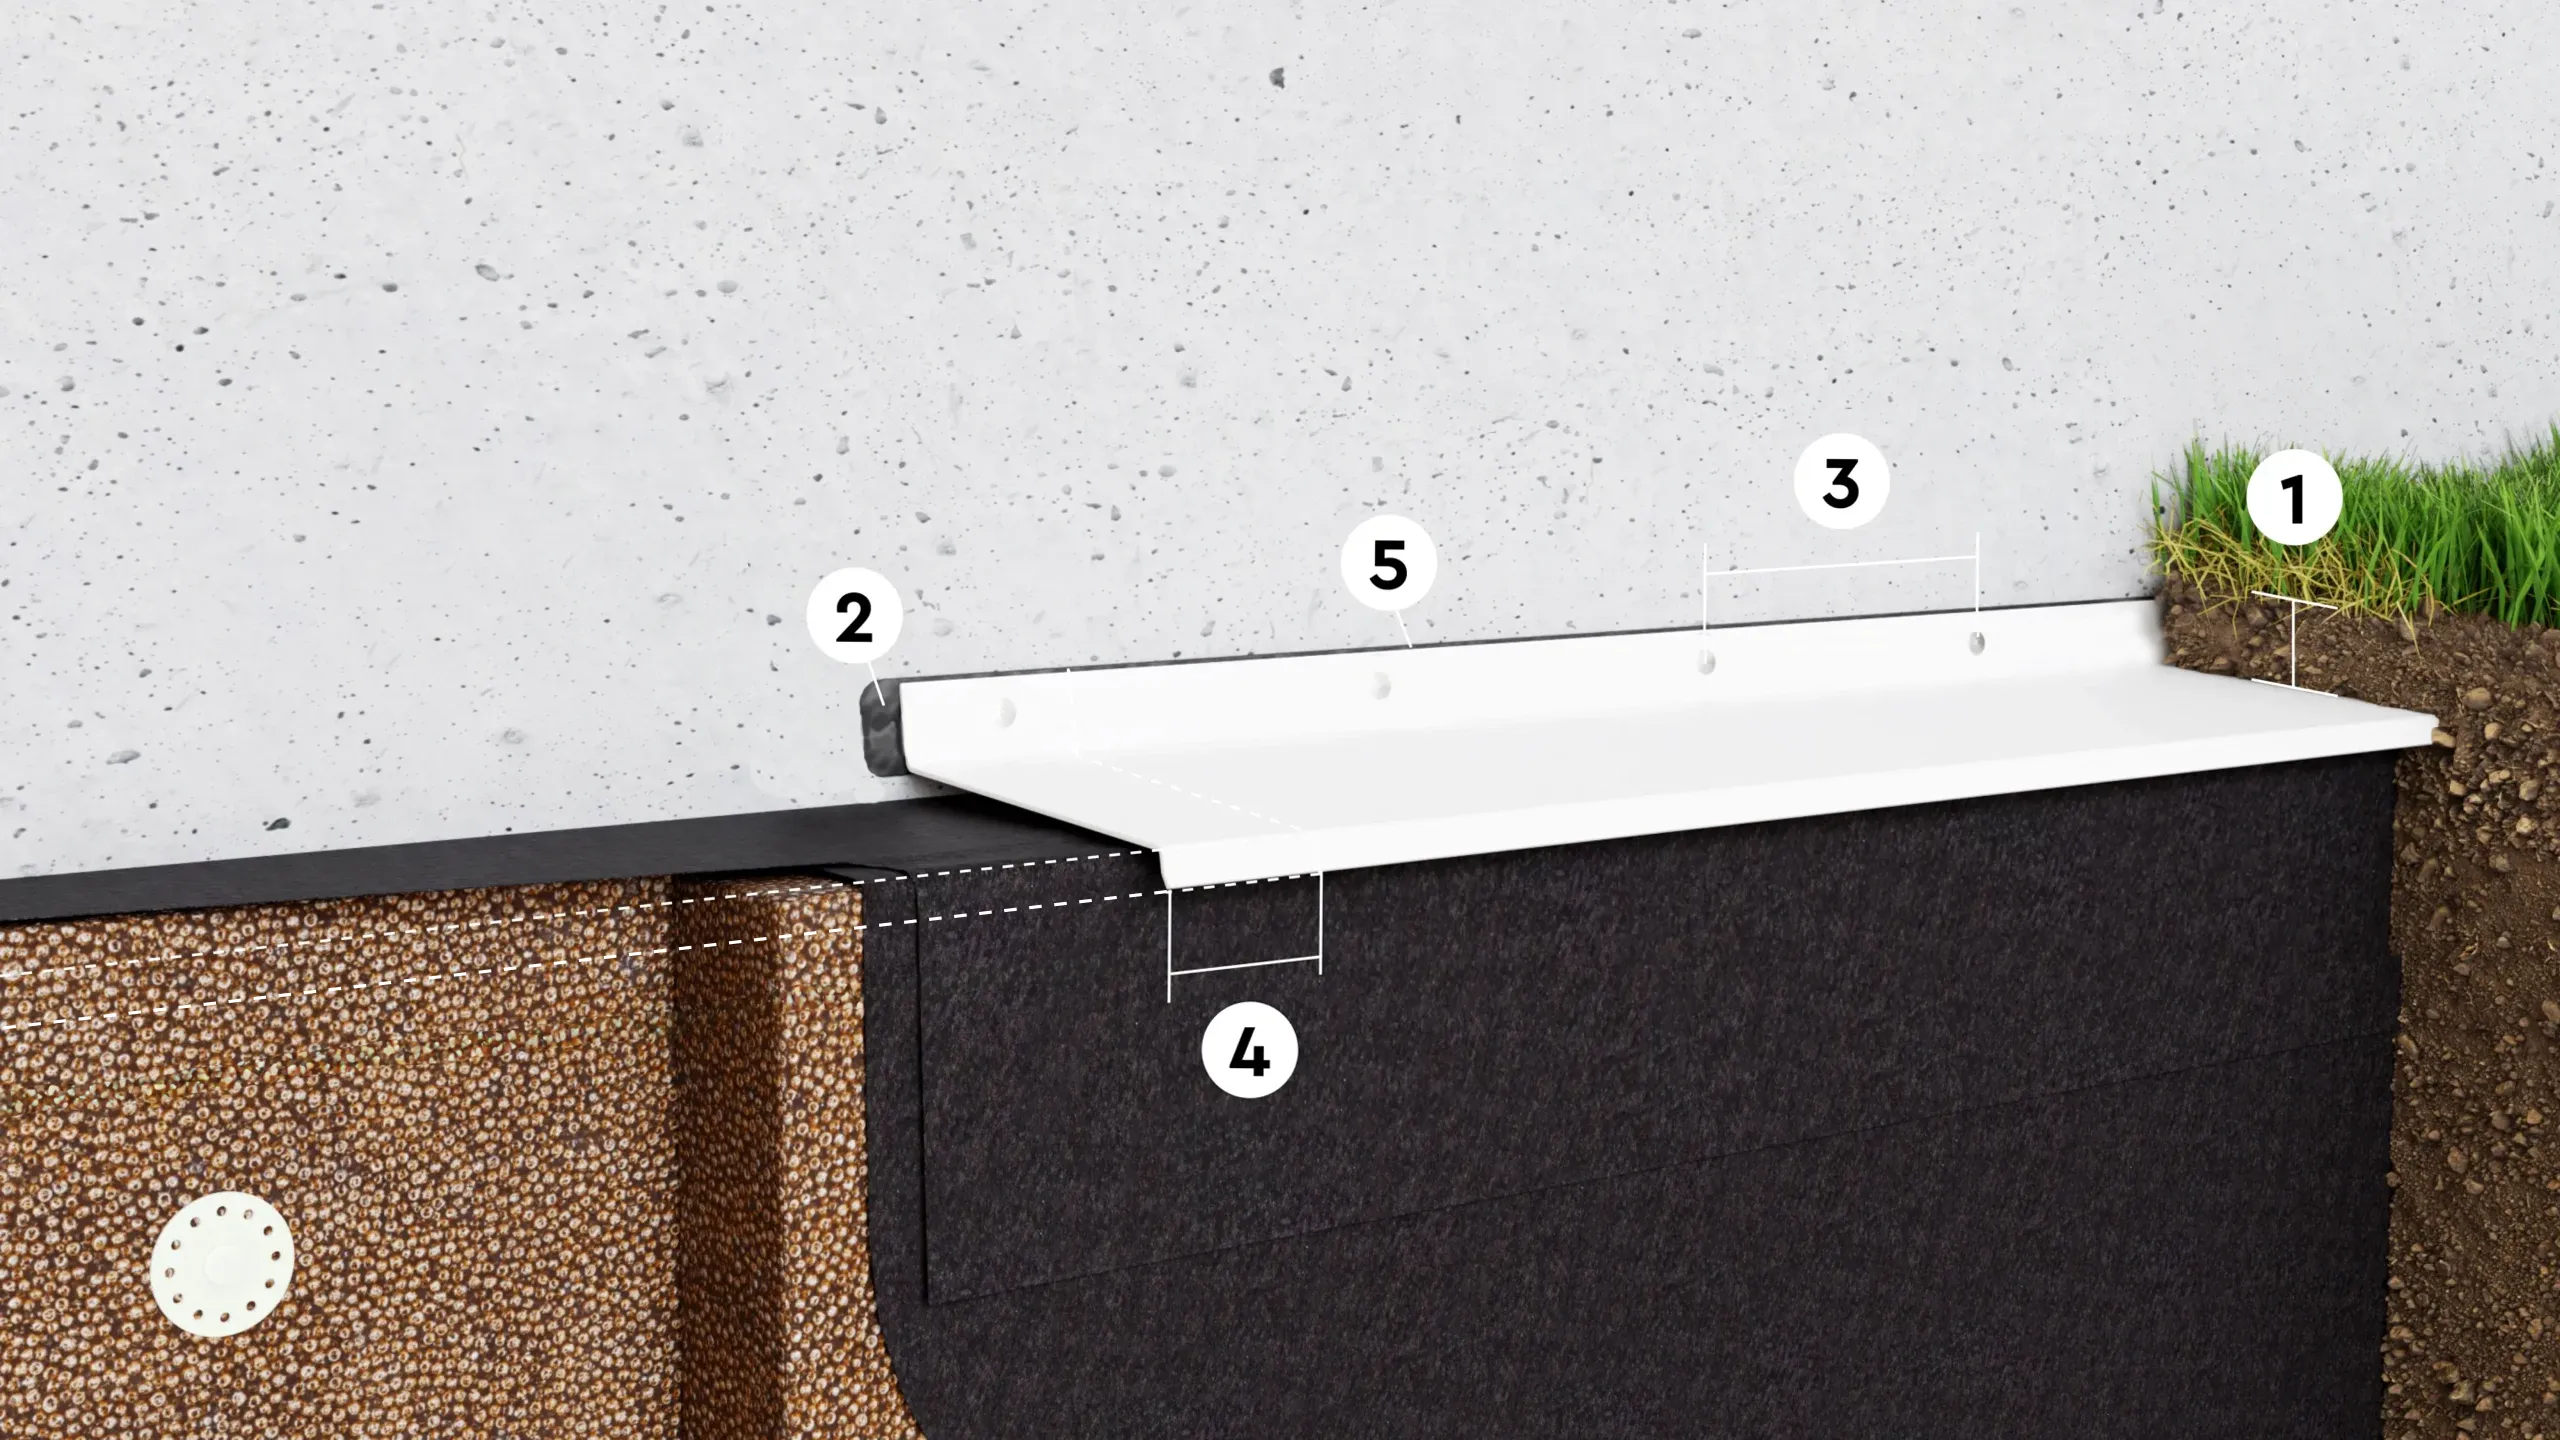
NOTE: Before you begin, please read the prerequisites and all the steps in the instructions carefully.
-
The cover strip should be 30–50 mm below the finished ground surface.
-
Apply a bead of Pordrän Tiivistysmassa the trim before installation.
-
Secure the trim with Pordrän , c/c ≤150 mm. If the wall is uneven, the rivets may need to be placed closer together.
-
Joints in the cover strip must overlap by at least 50 mm. In corners, use Pordrän or straight strips laid in a staggered pattern and sealed with Pordrän Tiivistysmassa. Our corner cover strips are available for both outside and inside corners.
-
The installation of trim moldings is completed by applying a bead of Pordrän Tiivistysmassa the joint between the wall and the molding.
Step 4
Refill
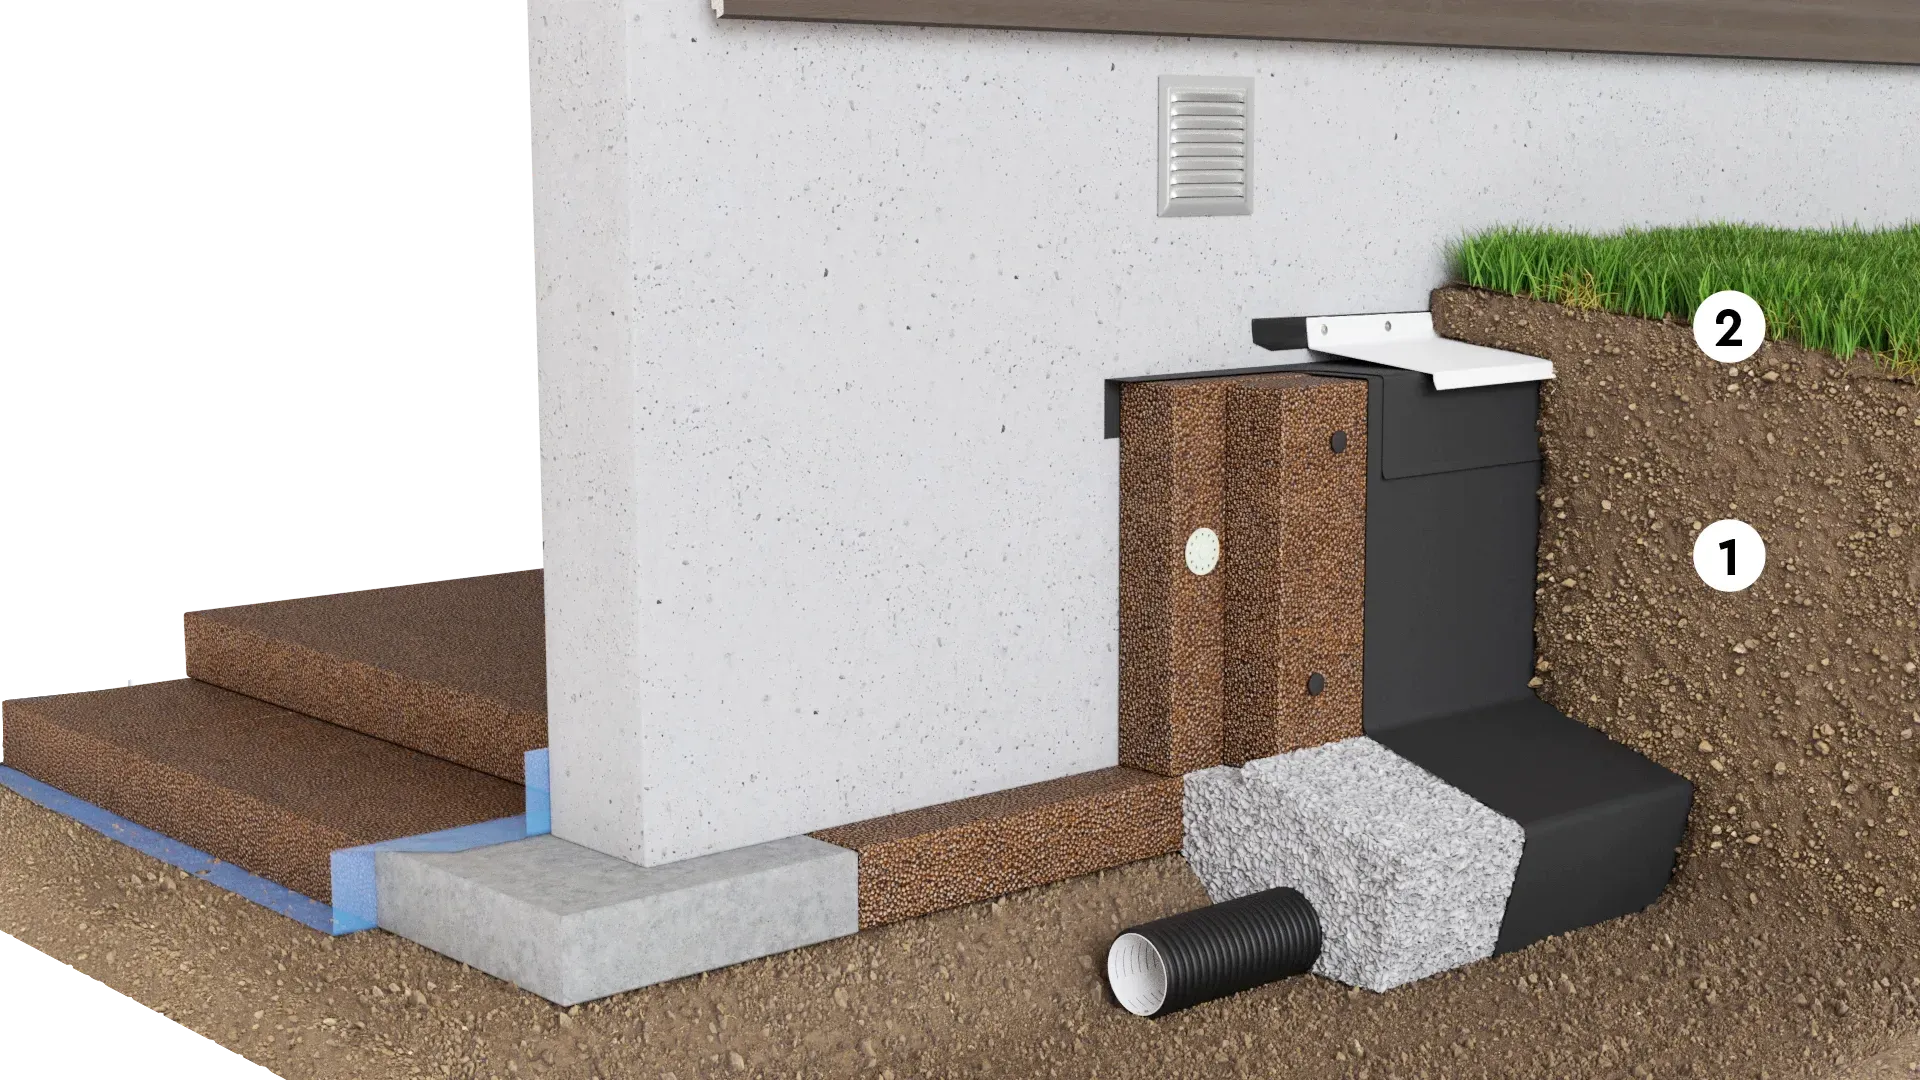
NOTE: Before you begin, please read the prerequisites and all the steps in the instructions carefully.
-
Backfilling shall be done using existing soil, but not stones larger than 100 mm in diameter or frozen soil. If larger stones are present, they must be placed on the slope of the trench so that they do not come into contact with the Pordrän panels. The top layer, approx. 300 mm, must always be backfilled with compacted material. Never use draining materials such as gravel or macadam. If the finished ground surface is to be paved, compactable material must be used.
-
The finished ground surface should, if possible, slope 2–3 cm per meter for at least 2 meters away from the building. NOTE: Check the slope of the ground at regular intervals and, if necessary, add new fill material so that the ground continues to slope away from the building.
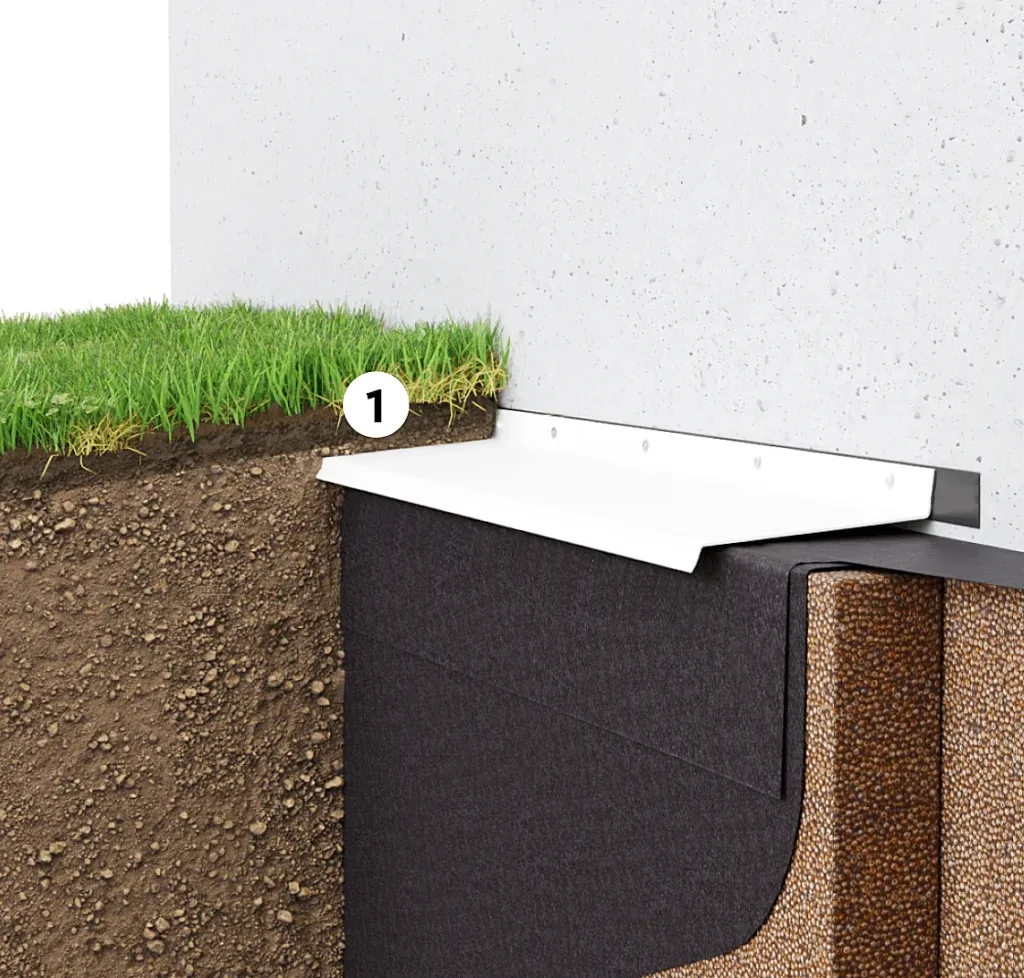
Grass surface
- No special precautions are necessary beyond the standard installation of a cover strip.
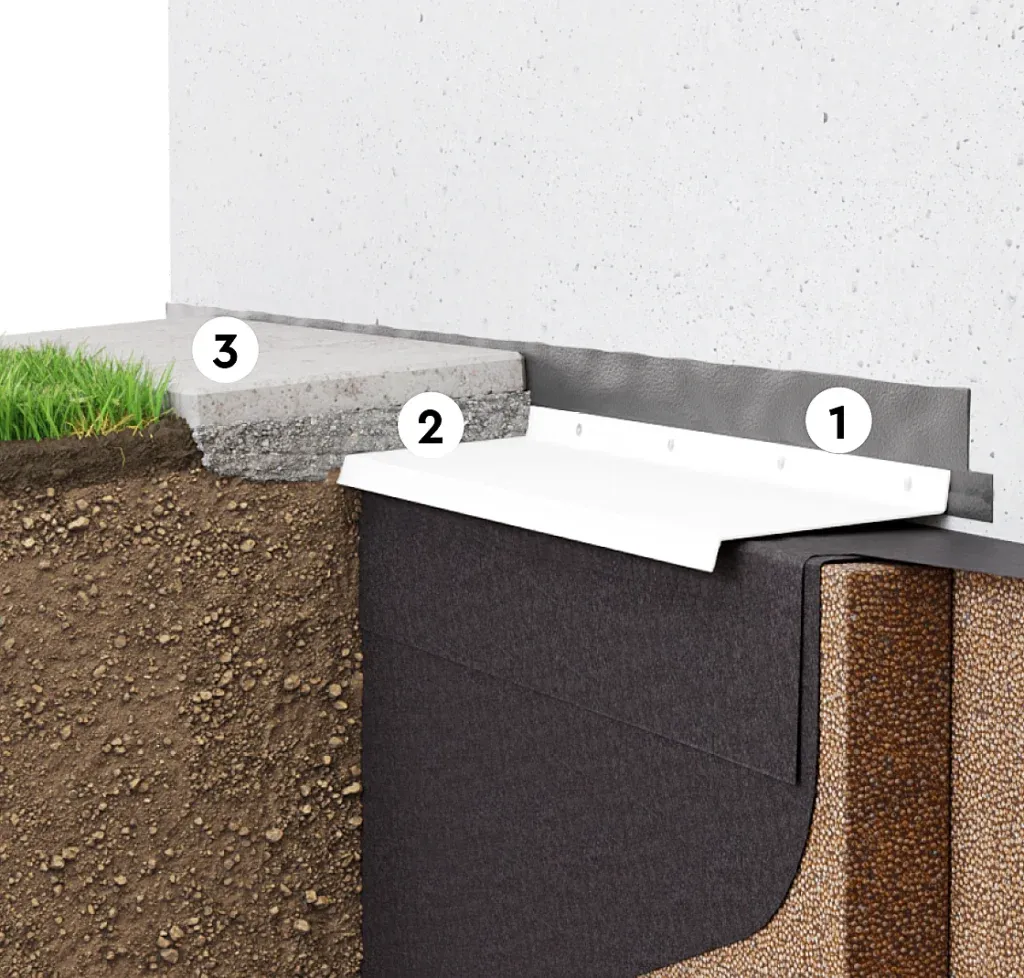
Surface layer: paving stones/slabs
- The waterproofing membrane against the adjacent foundation wall should extend a few centimeters above the top edge of the paving stones or slabs.
- A layer of adhesive is applied on top of the trim.
- Paving stones/pavers.
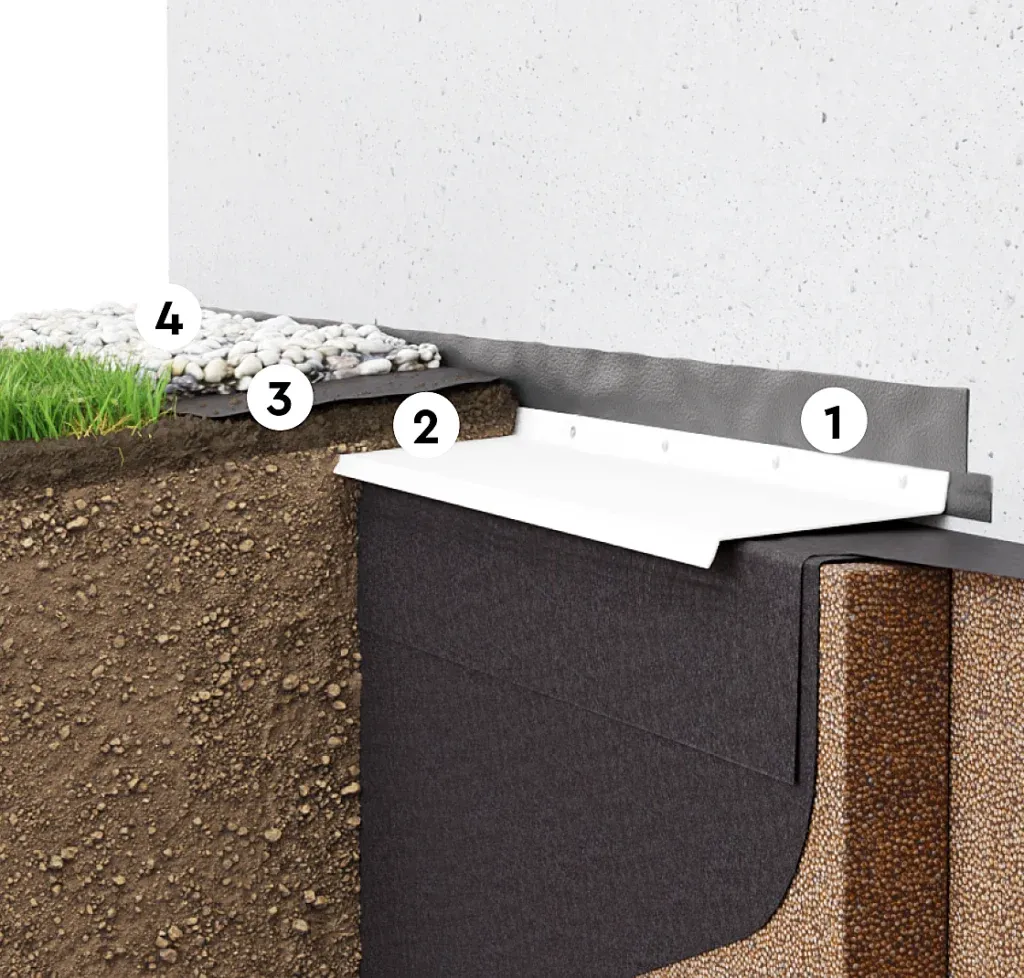
Decorative stone cladding
- The waterproofing membrane against the adjoining foundation wall should extend a few centimeters above the top edge of the decorative stone.
- A base layer or soil is applied on top of the cover strip.
- A geotextile should separate the decorative stone from the underlying layer.
- Decorative stone.

